Rapid Prototyping for ESPhome Graphics
ESPHome is a system to build custom firmware for microcontrollers to be used in home automation. Complex sensors and actors can be configured using a simple configuration file and an extensive component library. The library also supports visualizing system state on eink displays.
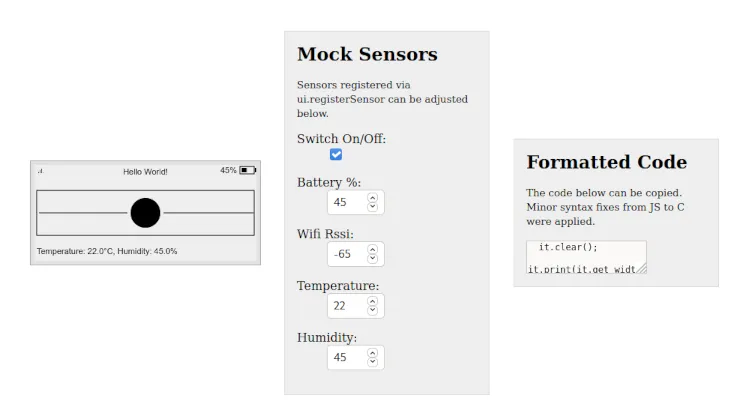
I have developed the toolkit esphome-drawmock to allow for rapid prototyping of user interfaces on the display. This is an early attempt to mock the display module of ESPHome so that designs can be tested before flashing. I use a web development stack using live-reload so that changes in the drawing code are immediately rendered in a browser window.
This work builds on my earlier esp8266 graphics library mock and extends it with a mock of several configurable sensor states that can be updated within the browser website environment.
Example
As a simple example I have mocked a weather station UI together with a set of sensors. The full example can be found in the repository

At the top of the file all the sensors that were configured in ESPHome need to be mocked. The variable names should match the ids configured in the ESPHome configuration.
const temperature = new NumericSensor("Temperature", 22);
const humidity = new NumericSensor("Humidity", 45);
We can then write the render loop following the ESPHome drawing api. Any changes will be immediately visible on the virtual screen rendered in the browser. The final rendering code can then be copied to the ESPHome configuration and be flashed to the device. JavaScript and C++ notation is mostly compatible. The UI automatically applies a few fixes to further improve the compatibility.
ui.registerRenderLoop( it => {
    it.printf(3, 110, id(my_font),TextAlign.LEFT, "Temperature: %.1f°C, Humidity: %.1f%%", id(temperature).state, id(humidity).state);
    [...]
})